 **What You’ll Need:**
* One healthy garlic bulb
* A clear glass
* Two toothpicks
* Clean water
* A pot or fabric grow bag
* Well-draining soil
**Step 1: Choose a Healthy Clove**
Select a firm garlic bulb without mold or soft spots. Separate one large clove and keep its thin skin on.
**Step 2: Place It in Water**
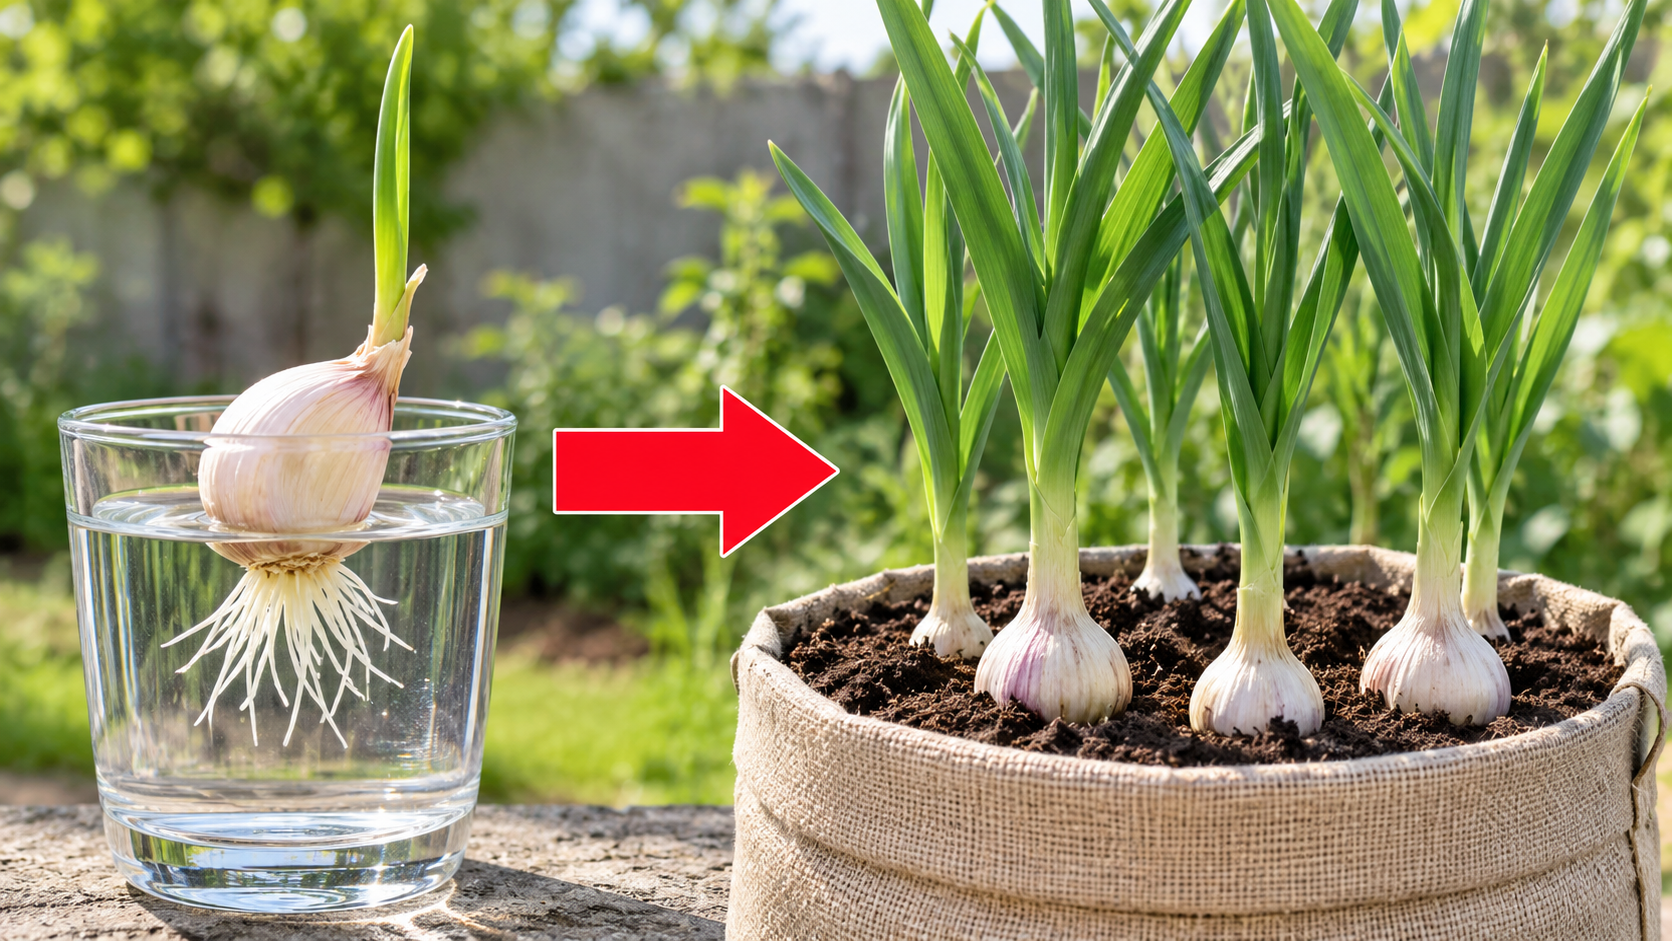
Insert two toothpicks into the sides of the clove. Balance it over a glass so the flat root end lightly touches the water. Keep the pointed tip above the water.
**Step 3: Change the Water Regularly**
Replace the water every two or three days. Do not completely submerge the garlic, because it may rot.
**Step 4: Wait for Roots and Shoots**
Place the glass in a bright location. White roots will grow from the bottom, while a green shoot will appear from the top.
**Step 5: Prepare the Planter**
Fill a pot or grow bag with loose, well-draining soil. Make sure the container has drainage holes.
**Step 6: Plant the Garlic**
Make a small hole and place the clove with the pointed end facing upward and the root end facing downward. Cover it with about 2–3 inches of soil.
**Step 7: Add More Cloves**
Plant each clove separately, leaving about 4–6 inches of space between them if you want full garlic bulbs.
**Step 8: Water the Soil**
Water thoroughly after planting. Keep the soil slightly moist, but never soaked.
**Step 9: Provide Sunlight**
Place the planter in full sunlight or in the brightest area available.
**Step 10: Take Care of the Plant**
Water whenever the top layer of soil feels dry. Remove weeds and prevent water from standing around the roots.
**Step 11: Harvest the Garlic**
For garlic greens, cut a few leaves when they are tall enough. For mature bulbs, harvest when the lower leaves turn yellow or brown.
With a healthy clove, sunlight, good soil, and patience, you can grow fresh garlic at home.